Ok, so here goes...
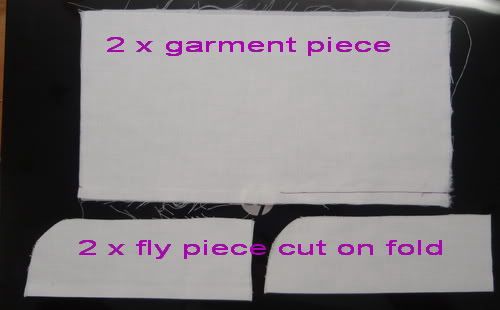
You need:
right and left garment piece
2 fly pieces cut on fold
a zipper
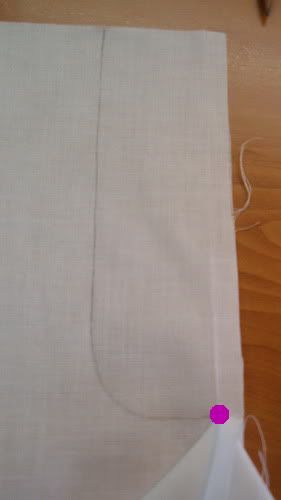
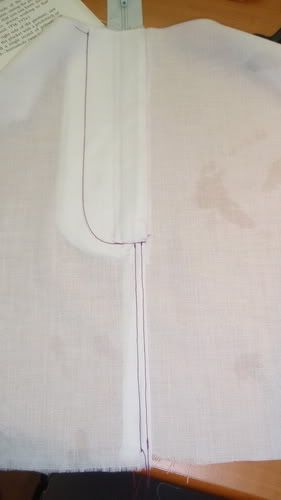
1. Sew the two garment pieces right sides facing to the point marking the end of the fly (marked with the dot on the pic). IMPORTANT: The right garment side should have seam allowance 1cm wide while the left one 2cm (or any other width you prefer, just keep the left garment SA larger).
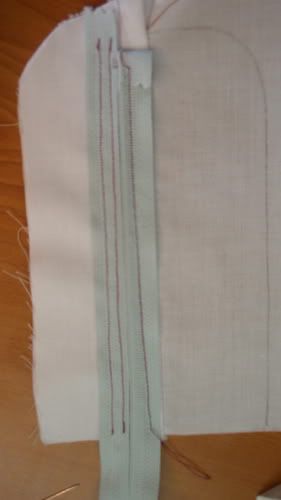
On the right garment side either draw, baste or however temporarily mark the fly stitching line.
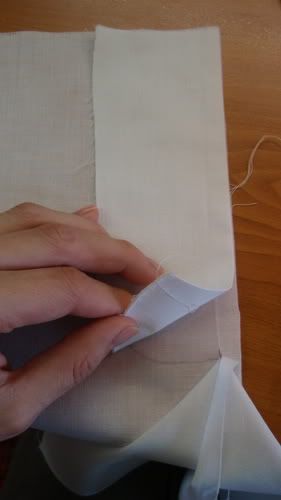
2. Baste and sew the right fly piece to the right front garment piece with right sides together (SA 1cm). Sew to the point marking the end of the fly. Trim the seam allowance and press the fly piece together with seam allowance away from the garment.
3. Place the zipper, right side down, on the fly piece. The left zipper tape should be on the seam which joins the fly piece to the garment. The bottom part of the zipper (the metal thingy) should be 2cm above the bottom end of the fly piece.
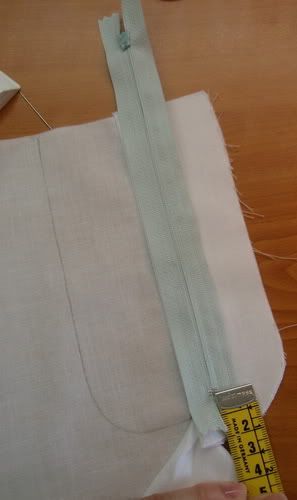
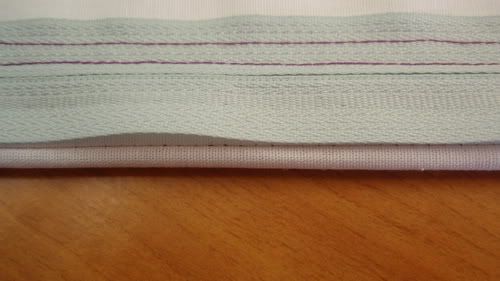
4. Baste the left zipper tape with the bottom part folded up. Sew the right zipper tape with a zipper foot as close to the zipper teeth as possible and sew the second seam somewhere in the middle of the zipper tape. Remove the basting on the left zipper tape.
5. Turn the fly piece in at the seam line and press. The important part is that you do not fold exactly on the seam line. The seam line should be a few mm towards the inner part of the fly. Like this:
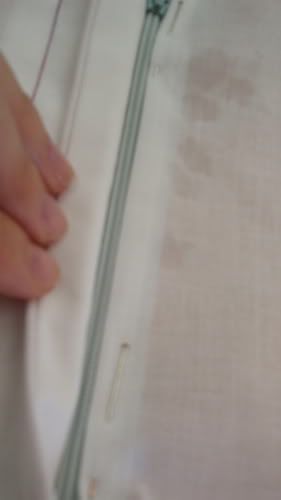
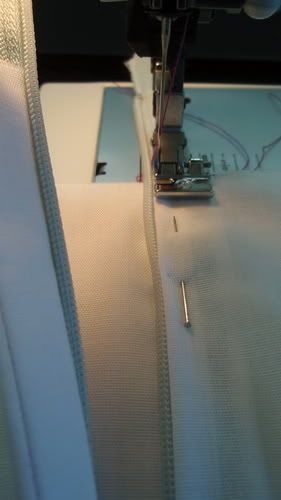
6. Sew the fly stitching line, following the previously marked line. Be careful here not to sew the left zipper tape. (please excuse the water marks)

7. Open the zipper and fold the seam allowance of the left garment piece by ONLY 1cm (by half basically). This is important to achieve really nice and flat results. Baste it to the left zipper tape. Close the zipper to see how it is. (this photo is really blurry, but hopefully you can see my point)
8. Turn the whole thing wrong-side-up and pin the left fly piece so that both fly pieces cover each other completely.
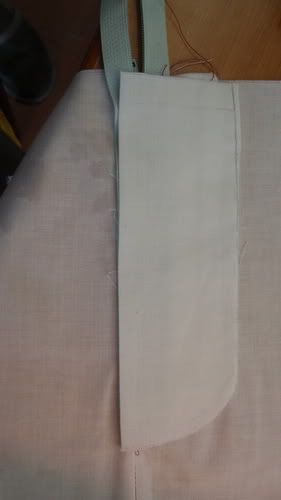
9. Turn right-side-up and sew with the zipper foot close to the zipper teeth through all layers (garment seam allowance, zipper tape and left fly piece).
10. Do not cut the upper part of the zipper until you attach the waistband piece. I didn't attach waistband piece here since it is only a practice piece. You can finish the garment with the flat-fell seam or leave it as it is.

And you're done with your perfect fly-front zipper :)
This fly-front zipper construction is a bit different that the ones you usually find in sewing books where the fly piece is already a part of the garment pattern. I wanted to try this technique because most of my RTW pants have this type of zipper construction, and I wanted to see if I can duplicate that. And I am actually pleased with the results. The Slovene book I told you about yesterday had the same SA for both garment pieces, but I discovered that you get much nicer results with different seam allowances. Plus this makes making flat-fell seams easier. So, I actually ended up improving the technique. I'm feeling really proud of myself right now :)
I hope this was helpful.
Nicely done.
ReplyDeleteWhat a great post! I'll look around a lot in your blog along for you have many things to share here, so I link you.
ReplyDelete